

Customising your YouTube channel lets you add links to your website, channel art, playlists, highlight videos and basically point your viewers to the content you want them to watch. YouTube has just updated the way you customise your channel so let’s have a look.
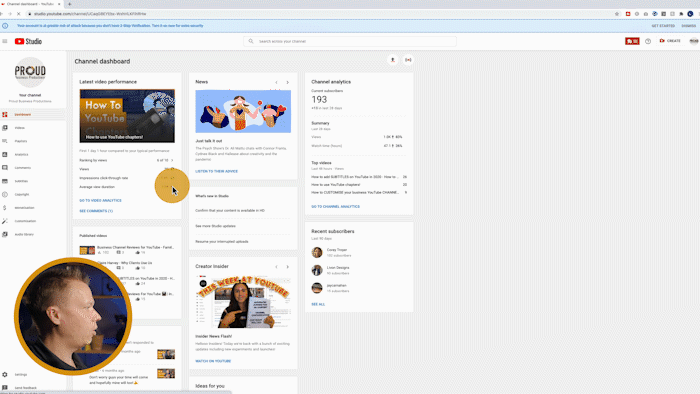
Start by going to your YouTube studio by clicking your icon in the top right and selecting YouTube Studio.

How to get to the YouTube Studio
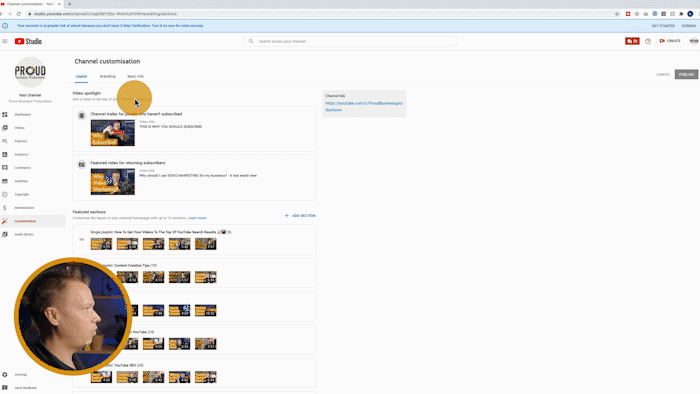
Now, on the left-hand side, you will see a new tab for ‘Customisation’. After you’ve clicked this you will see that it’s split into 3 separate sections, ‘layout’, ‘branding’ and ‘basic info’. Let’s work through them.
The customisation tab.
The ‘Layout’ Panel
Layout refers to the layout of your channel and up the top, we have ‘video spotlight’. You can select either a trailer for your unsubscribed viewers or pick a featured video for any subscribers returning to your channel.
Just click add to select your video, you can either scroll through the list or use the search box at the top.
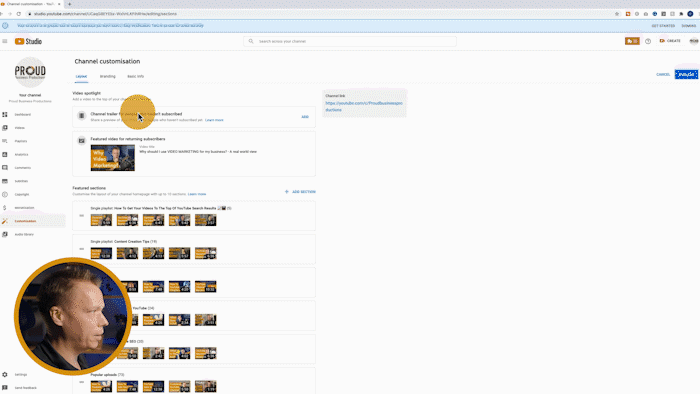
Add a featured video to the top of your channel
Moving down we have the channel sections. You can add up to 10 sections to your channel and these can be playlists, a list of your uploads, featured channels, channels you are subscribed to and options for live streaming.
Just click ‘Add a section’ and then select the section type you want. It will add this section to the bottom of the list.
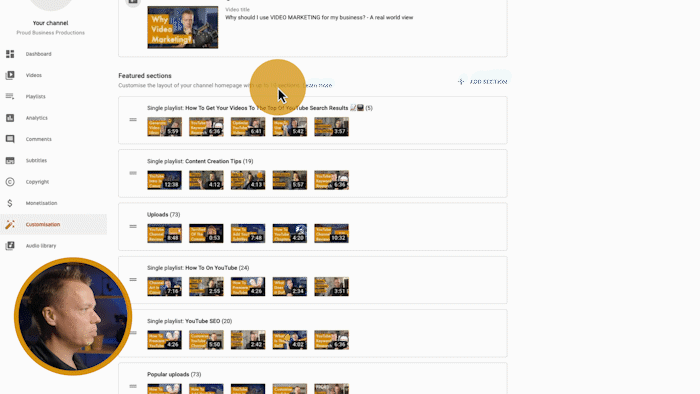
Add sections to build out your channel
The order of these sections reflects the order that they will appear on your channel. To re-order them just click and drag on these double bars on the left-hand side.
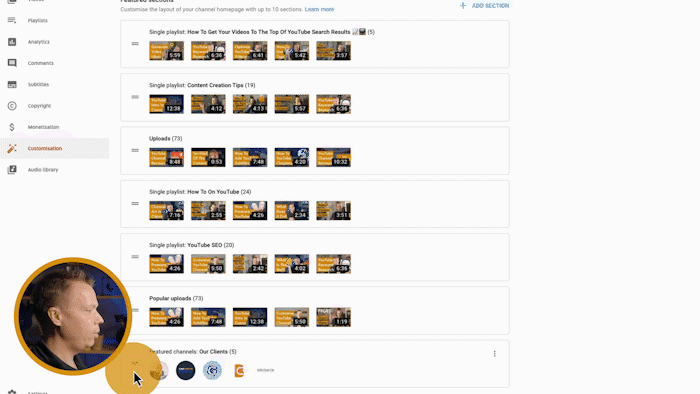
Move the sections around by clicking and dragging
Just keep in mind that you are arranging your channel layout to tell your viewers what to watch first so it’s worth including a playlist of your most popular content up the top.
The ‘Branding’ Panel
Let’s move on to the branding panel. First of you have your profile picture, pretty self-explanatory.
Add branding to your channel.
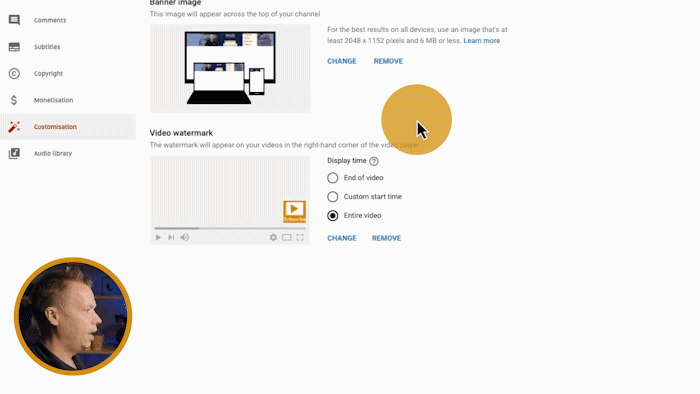
Next, you have your banner image or channel art. It’s worth noting that YouTube has changed the recommended dimensions for your channel art to 2048x1152 so now is a great time to update your art.
Here’s a handy new feature, when you upload your channel art you now see an overlay of what areas of your banner image will be visible on which device.
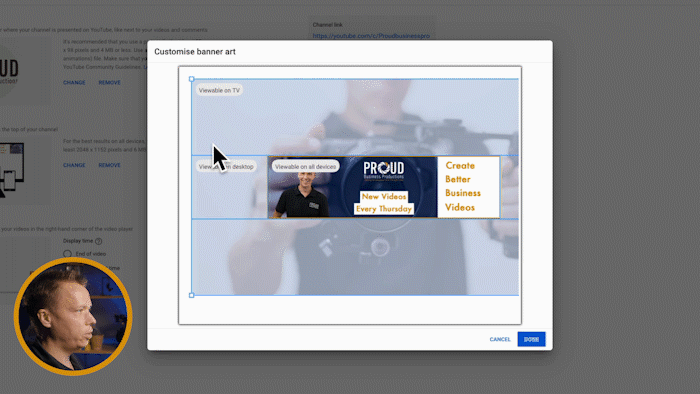
Use this tool to see what areas of your banner image will be shown on certain devices.
Lastly, you have your channel watermark. Hovering over a watermark while the video is playing will bring up a subscribe button so it’s worth making a custom button for this rather than just using your logo. You can also pick whether you want your watermark to appear at the beginning, end or throughout your video.
The ‘Basic Info’ Panel
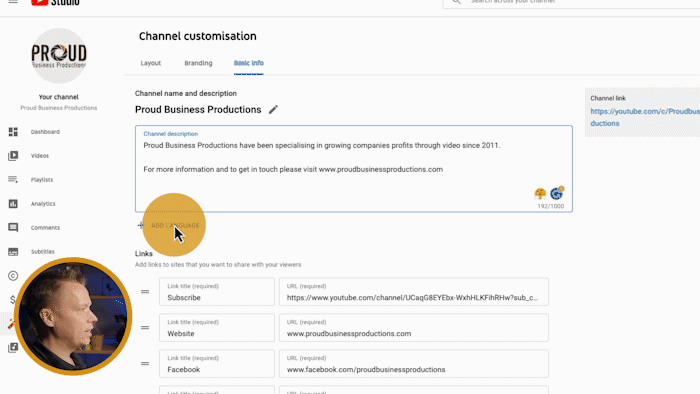
In the final section, we have ‘basic info’. At the top, you can add your channel description to let your viewers know about you and what you offer.

To your viewers about you in your channel description.
Another handy new feature, you can transcribe your channel into other languages, great if you are trading overseas with your business. Just select your original language, the language you are transcribing to and then fill out all the details. If a native speaker of your transcribed language then visits your channel, they will be able to see it in their language.
Translate your channel details into other languages.
Moving down you can add links. These appear on the right in the corner of your channel art. You can add multiple links but my advice is to keep it simple. Just add one link with what you want your viewers to do. For us, it is a subscribe button but you could have ‘Check out our website’ or follow us on social media.
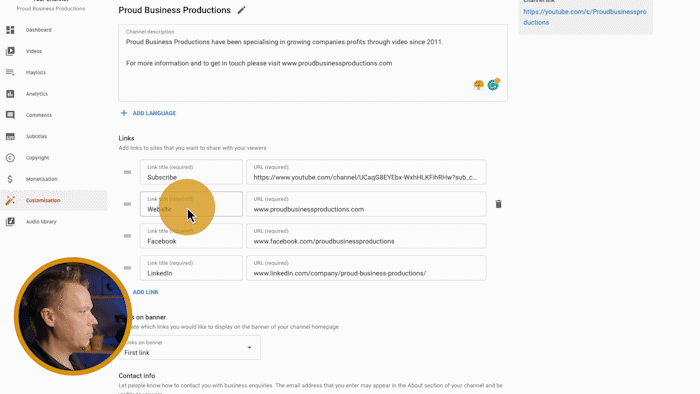
Add links to other websites.
If you would like to include multiple links but not have them appear on your banner then you can select how many links show up on your banner by clicking ‘Links on banner’ and select up to 5. The links are shown in the order above so just click and drag on the left to reorder your links.
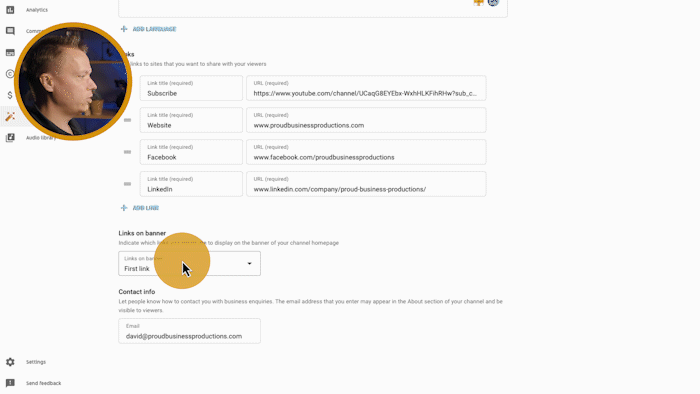
Lastly, you can add a contact email address if you would like your viewers to get in touch with you directly.
As I said at the beginning, it is well worth making sure your channel is fully customised as it will help you stand out from the competition as most channels don’t bother.
Do you want to create better-looking videos?
Editing your videos instantly makes them look more professional and lets you add things like calls to action, branding and music but where do you even start?
In my new course ‘How To Edit Your Business Videos’ I will show you how to use the video editor Filmora to instantly improve the look of your videos.