One of the great things about YouTube is that they're always updating their features to make them more user-friendly and with that in mind they've just released their new subtitles editor.
In this post, I'm going to show you how to use the YouTube subtitles editor and tell you why you should be manually editing your subtitles.
Why Should You Use Subtitles?
Obviously, subtitles are great for those people who are hard of hearing because it makes it a lot easier for them to view your video but it also helps people who are viewing the videos at work because they may not be able to have the sound on.
Surprisingly there's also another little hidden benefit of using subtitles. They actually tell YouTube and by extension Google, the subjects of your video, the actual content included in your video. This will help YouTube and Google know what search terms to include your video in.
It also helps bump you up in the search rankings if you edit your subtitles because it's showing YouTube that you're actually going in and spending time on the things that are really valuable to their users.
By editing, you're also telling YouTube that this is, in fact, the actual content of the video, you haven't got the automatic transcription wrong.
How To Easily Add Subtitles
We'll start in the main video details page in YouTube studio, go down to the bottom-left and click 'Subtitles'.
How to find the subtitles tab
You will want to wait for the automatic subtitles to upload, depending on you the length of your video this can take 10 minutes or it could take a couple of hours. Just wait until it's finished automatically transcribing otherwise you're going to have to fill in all the subtitles manually and this will make the process a lot longer.
At the top, you will find the automatic subtitles. To edit them click 'Duplicate and edit', this will bring up the subtitle editor.
Click ‘Duplicate and Edit’ to edit your subtitles
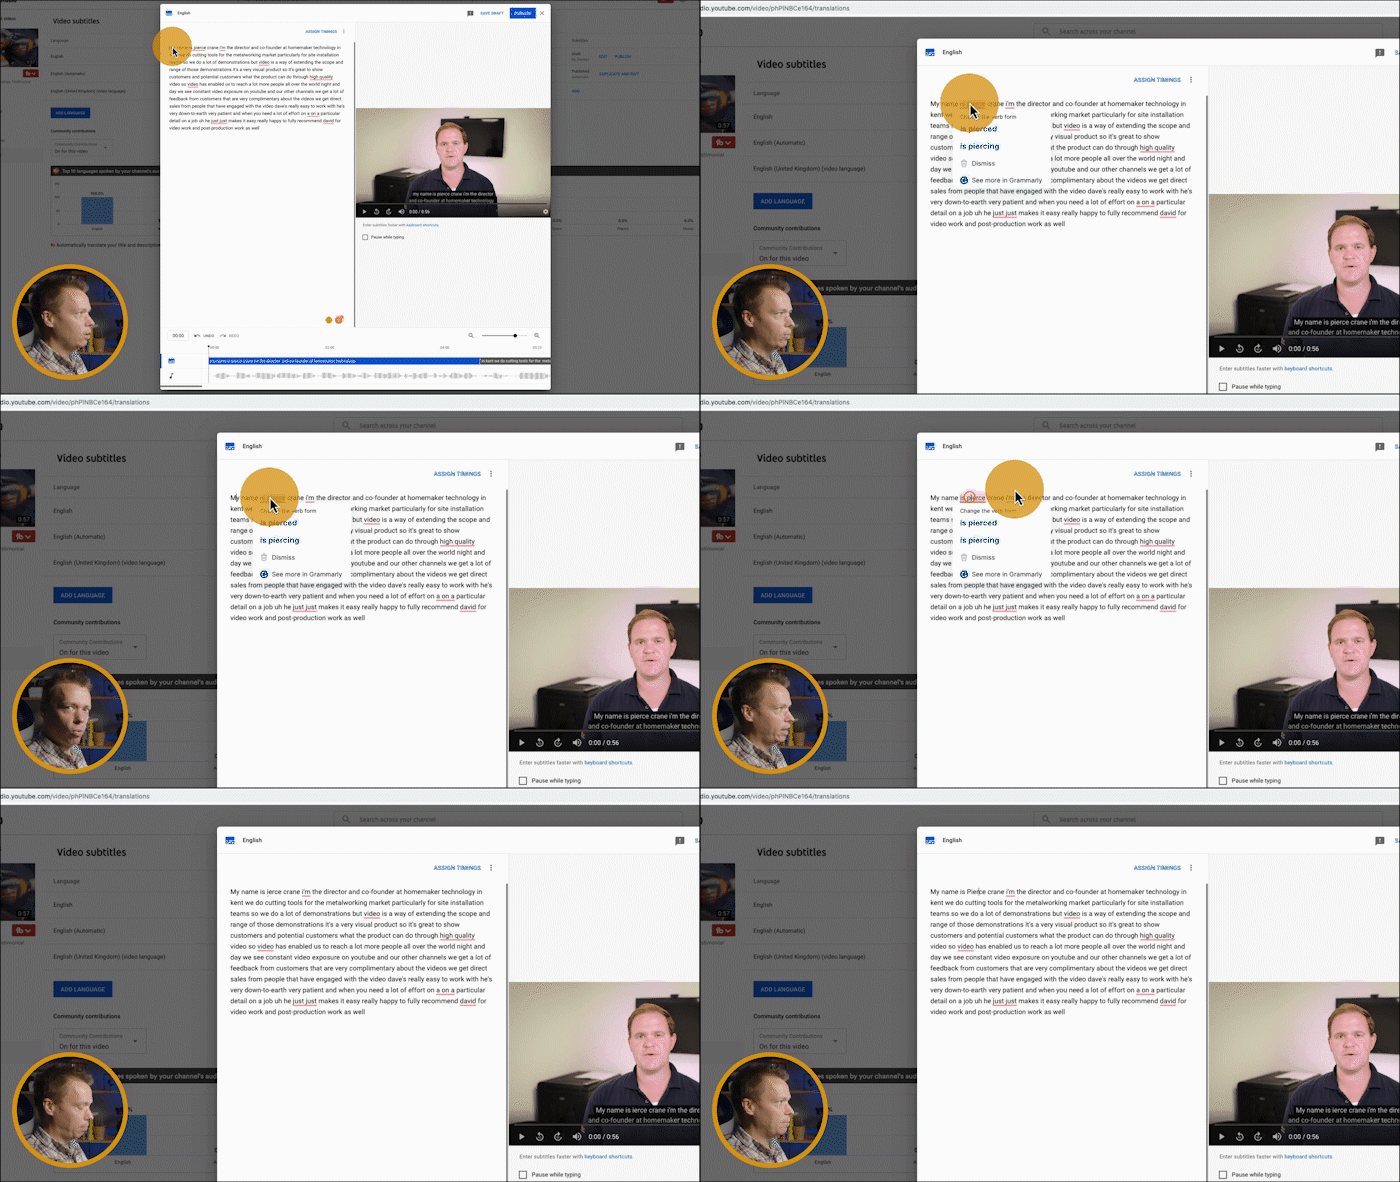
There are two ways of editing your subtitles. First, you have a long text file. This might be easier to edit in the first place as you can just read through it and make all your changes in one big block.
The ‘Edit As Text’ screen.
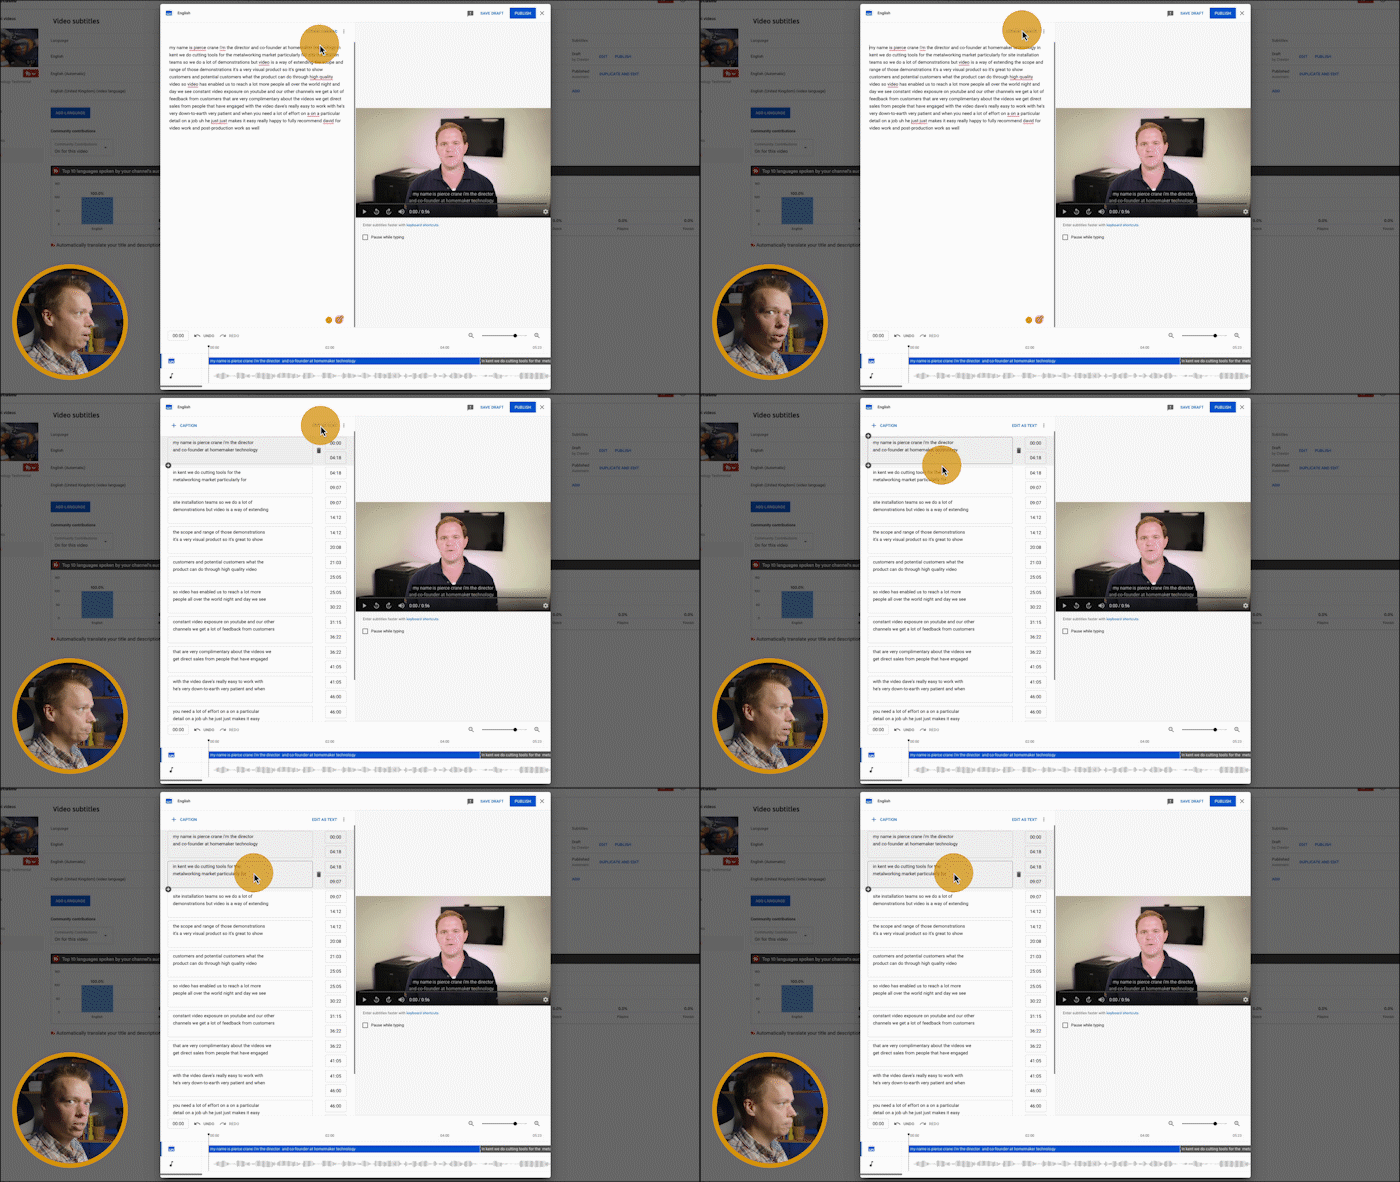
Clicking on 'Assign timings' will give you the second way of editing. This breaks the text down into the subtitle boxes.
The ‘Assign Timings’ screen
Edit As Text
Let's look at this both ways, let's start with the edit as text. The idea is for you to go through and edit all the bits that are incorrect and add grammar and punctuation. If you've got a tool like Grammarly it makes the process a lot quicker and easier.
Assign Timings
Let’s have a look at assign timings. You find your text on the left and the times that appears on the screen (or your timings) to the right. The main thing in this section is to make the text as easy to read as possible. Look out for areas where a few words carry over on to the next subtitle block. Can you fit them into the block before to complete the sentence?
Assign timings example
Look at the example above. The sentence is 'My name is Piers Crane, I'm the director and co-founder of Holemaker Technology in Kent' but the ‘in Kent’ is moved into the next subtitle which breaks up the sentence. By moving 'in Kent' to the subtitle block above you are completing the sentence and making it easier to read. Just remember to delete the text in the other box so that you’re not duplicating.
Get Your Timings Right
Editing the text in the boxes could change the time that the subtitle is meant to appear on the screen, this is what we call the timing. There are two ways of editing the timing.
The first way is using the timing numbers on the right. The first number is when the subtitle appears on the screen and the second number is when it finishes.
Watch the video and listen to when the text in the box starts, pause and write that number in the top numbers panel. Keep playing the clip and listen for when the text ends, now write this number in the bottom number panel.
Assign timing with numerical values.
But this is a very long way of doing it. Instead, you can use the waveform monitor at the bottom which is a visual representation of the audio in your video. By looking at this you can clearly see when you start and stop talking.
Listen to the clip and pause at the end of the text in the box, make a visual note of where the audio is on the waveform and then click and drag the end of the required subtitle box to where you need it.
Drag the blocks at the bottom the change the timings
Once you have finished editing just click publish to save your work.
Click ‘Publish’ to save.
Once you are finished with your subtitles make sure you delete the automatic transcript by clicking on the right dots on the right and selecting delete.
Social Media Subtitles
But what if you want to use the subtitles on your social media channels? Well, I’ve got great news for you, you can now download your subtitles file to upload on Facebook and LinkedIn. Hover over your new subtitles file and three dots will appear on the right-hand side. Click them and select ‘Download’ and the ‘.srt’. To make this file compatible with Facebook you will need to add .en_US after your file name and before .srt.
Once you’ve named your file and downloaded it to your computer you can now add your subtitles file when uploading your video to Facebook and LinkedIn. This means that the subtitles will appear if the video is muted but will fade away once a viewer turns the sound on.
I hope you have found this post helpful. If there is a subject you would like me to cover in a future post let me know in the comments.


