A good video intro can help elevate your brand and prepare your viewers for what they will learn in your video.
You may think creating an intro is complicated and involves learning professional software but did you know you can create YouTube intros in Canva? Watch the video below or follow the written steps to easily create your video intro.
Getting Started
Start by heading to canva.com. Create a free account if you don’t already have one.
In the search bar at the top write YouTube Intro.
Now you have a page full of templates, just scroll through and pick one that closely represents your brand. Don’t worry, we can change the colours, font, text and background videos.
Click on the template you want to use.
Edit Your Assets
Now we can start editing. First, let’s change the colour of the background layer as this will help us later on. Move any elements out of the way so that you can see the background. Click Background in the panel on the left.
Click the colour panel in the top bar, select ‘New Colour’ and then use your brands colour by entering your HEX code.
Next, let’s change the colours of the main element, click on it to select it and click the colour box in the top left-hand corner. As we have already entered our HEX code, our branded colour can be found in the document colours.
By changing the main element colour it means that the colours on the side don’t work any more.
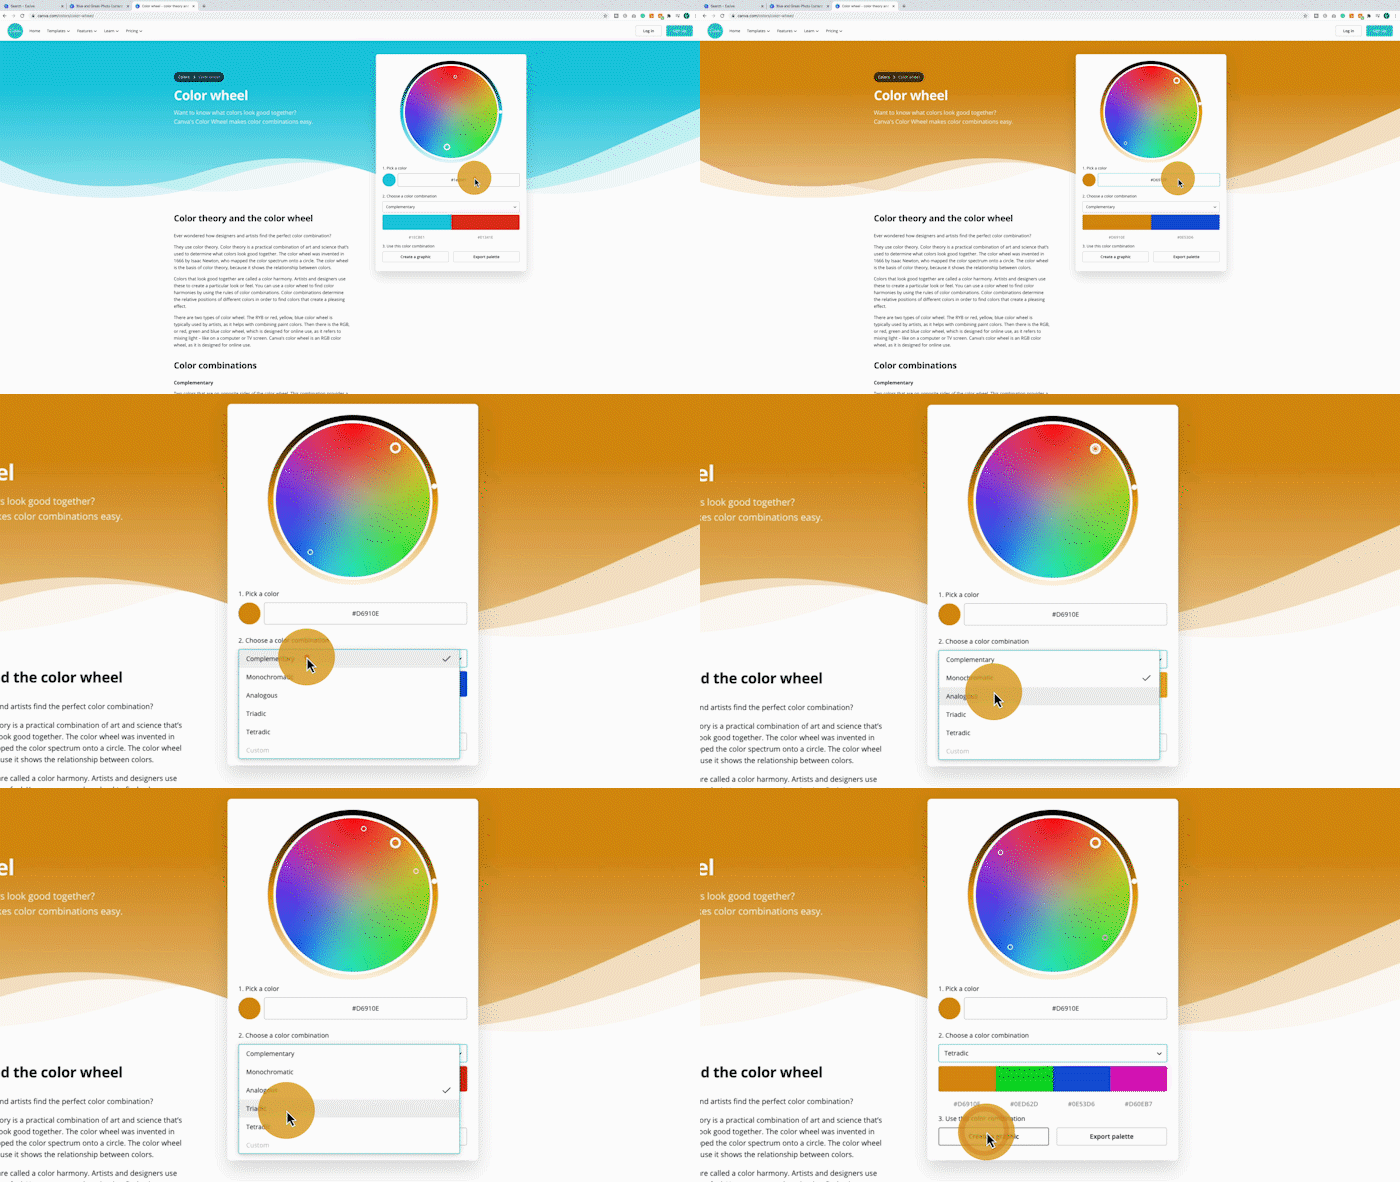
To find the right colours to use I’m going to look at another handy Canva tool, the colour wheel which you can find at canva.com/colors/color-wheel/.
Again if we paste the HEX code for our branded colour it’s going to give us a few options for colours that work well with your selected colour. Try a few of the colours to see what works for your intro.
Another option would be to delete these elements and replace them with your own. I am going to replace them with camera icons.
Select elements on the left hand side and search for the elements that represent your brand. I am going to search for camera.
To add the elements to your intro just click and drag them. you can resize the elements by clicking and dragging in the corners, rotate by clicking and dragging on the rotate button below centre line and reposition by clicking and dragging in the middle.
You can also change the colour by clicking the colour block in the top left and following the same steps as before.
How about adding a logo to your intro? Click on uploads and click ‘upload an image or video’. Select the file you want to use on your computer.
Click and drag the image on to the design and resize and reposition it to where you want as I showed you before.
Editing The Text
Now for the main text. Let’s start by changing the font. Click on the text and you will see the font name appear in the top bar. My branded font is Proxima Nova which Canva doesn’t support but from a quick Google search, I know that Montserrat is very similar. Changing the font may also change the size and position.
Now I want to change the colour, click on the ‘A’ with the colours beneath it. I’m going to keep this simple and just select white.
Now to change the actual text. You have two options here, you can either create one intro which you will use across all of your videos, or you can create a new graphic using your template which will include the name of each video.
If you want a generic intro, use the text box to talk about what your channel covers in general or to make it video-specific just talk about the subject of the video.
You click and drag the box to change the size of the text area and where it is placed.
Adding Footage
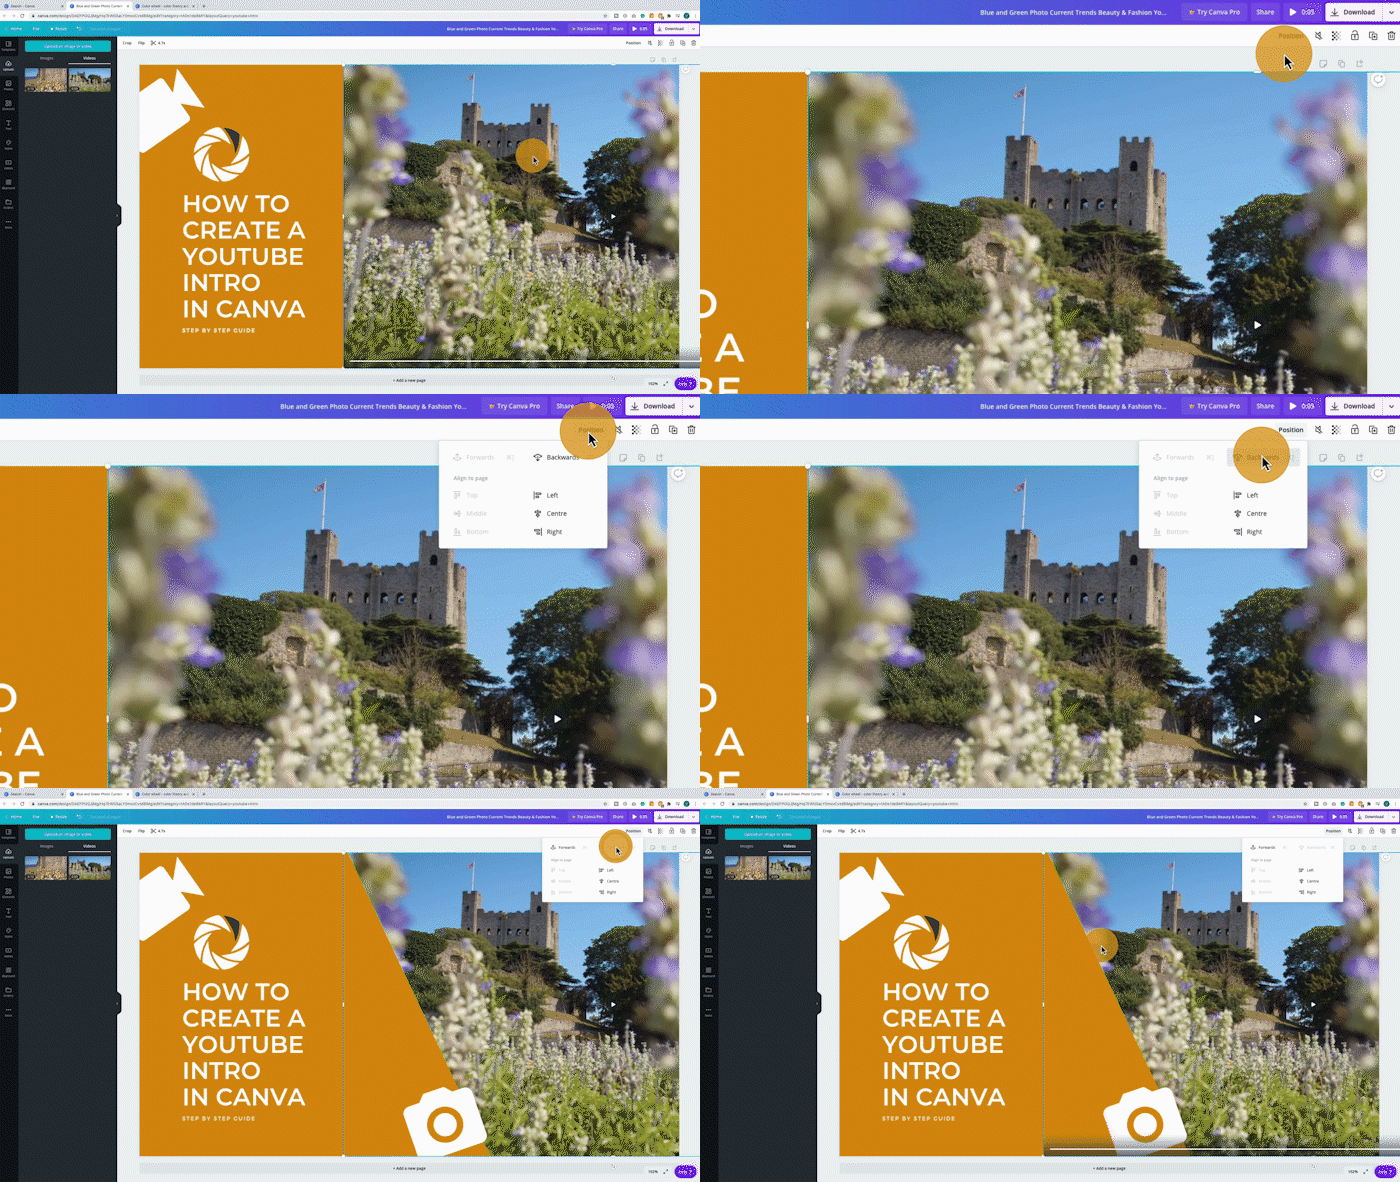
We are moving into the last few steps, let’s add our own footage. Click on the clip that is already there and hit the delete key on your keyboard. Go back to uploads and upload the footage from your computer. You can find your video in the videos tab. It may take a while to upload depending on the size of your video.
Click and drag your clip onto the canvas. If you clip has audio you can mute it in the top bar.
Resize and position your clip so that it is in roughly the right place and then click position and select backwards until it is behind your colour layer. You can still click and drag it to get it in the right place.
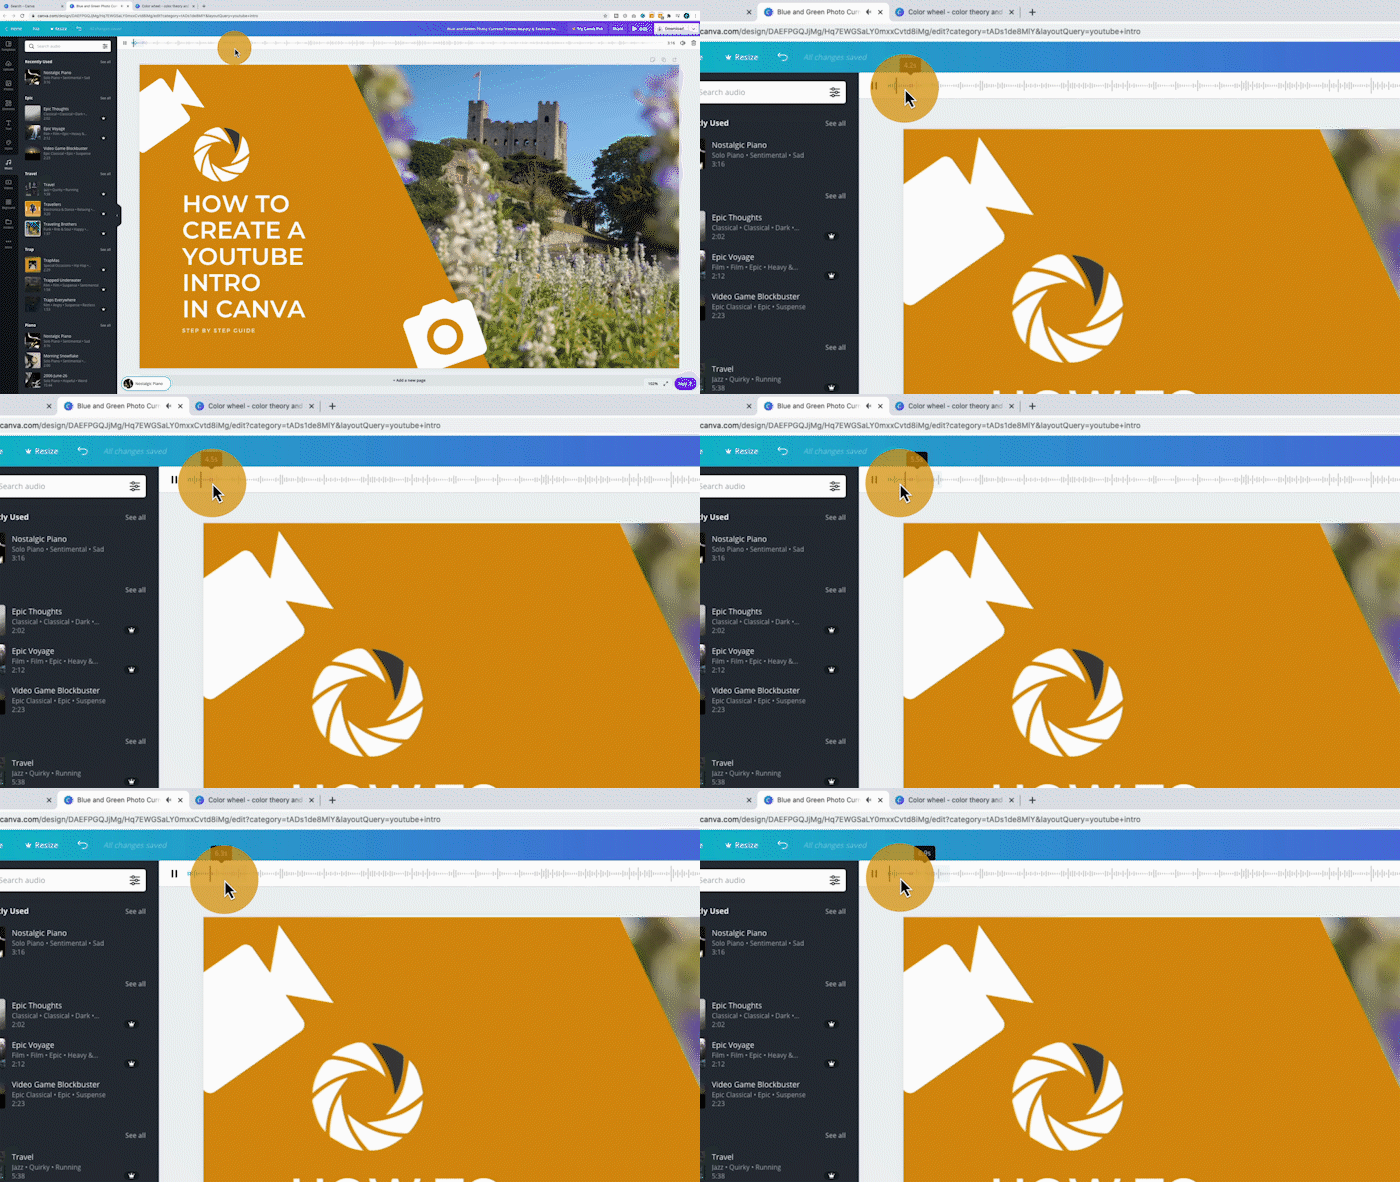
A great way to add a little bit more to your intro is to add some music. Click more and then music. A lot of the music is only available to Pro members but just scroll through or use the search bar to find something that matches your companies identity.
Click and drag the audio on to your canvas. You will now see a bar at the top which will let you pick which part of the track you want to use. Unfortunately, there’s no way to fade your audio at the moment but hopefully this a feature they will include in the future.
Adding Animation
Now let’s add some animation, click anywhere away from your canvas and select Animate in the top bar.
You can now see 10 animations with 5 available in the free version. Hover over the animations to get a preview and click to select the animation that you want to add to all of your elements.
If you want to add more pages with more information you can now select duplicate and you will have another copy of your page, just change the text and video and any other elements you want.
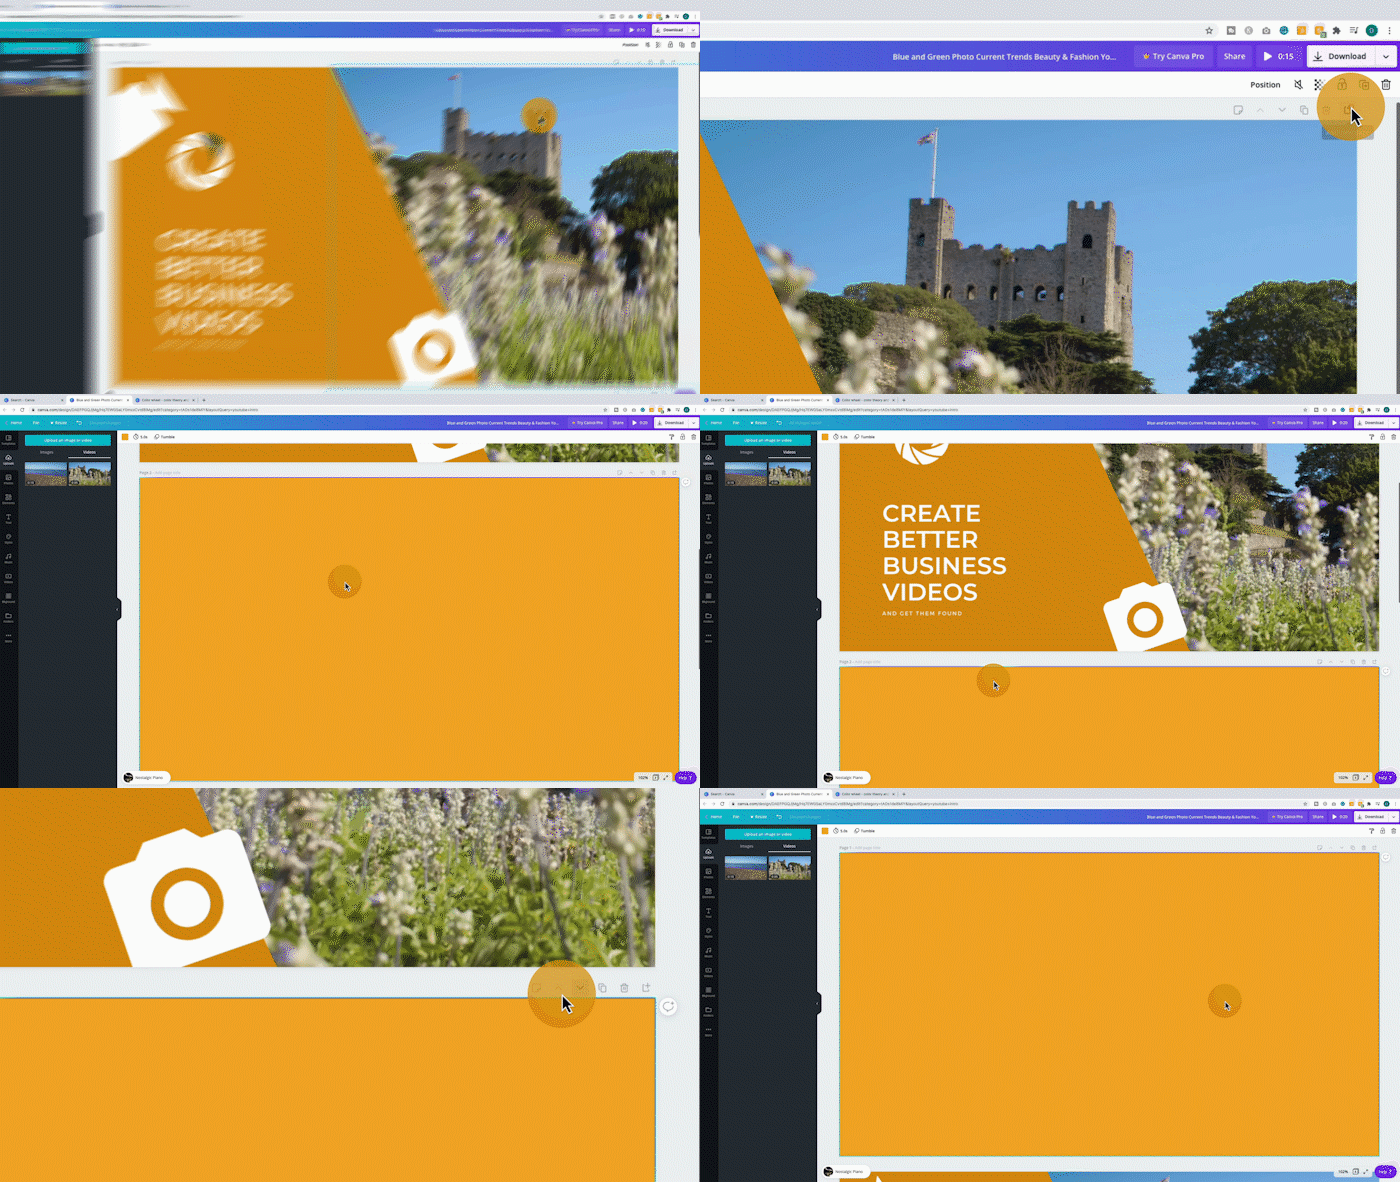
One last thing you should do is add a page at the start with just your background layer, this will make it easier to transition into your intro from your video footage. Click ‘Add new page’ in the top right and then use the arrows above the new layer to move it to the top page.
You can preview your intro by clicking the play button at the top. When you are finished just click download and select MP4.
That’s it, you should have an intro like the one below. Import the video into your editing software and you are good to go.
I’d love to see some of your intro examples, please leave a link in the comments.


